
In this tutorial you will tackle how to create a 3D effect looking plan from a simple 2D plan. This effect works fairly great in highlighting a significant interior space in a presentation. Apart from this, this tutorial will teach you how to define a pattern for applying materials.
Preview of Final Results

Design a 3D Floor Plan with Photoshop
Step 1
Start by downloading this file then opening the PDF in Photoshop. We’ll use the texture of the parquet wood later.
2D Plan.zip | 270 KB

Step 2
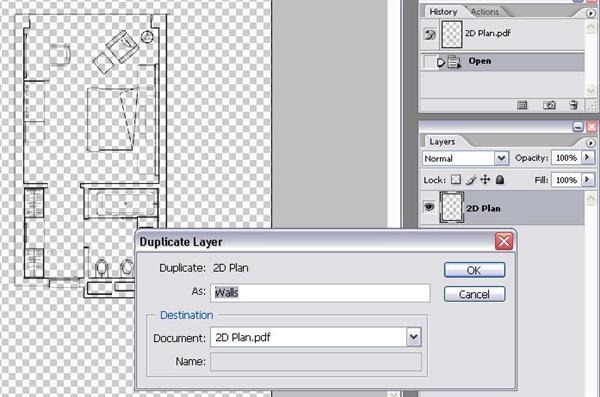
Now, you right click on the layer of the 2D Plan and duplicate its layer as shown in the image below named as Walls. Then repeat the same process but this time have the copied layer renamed as floor. Basically you will have three different layers in this first step.
Step 3
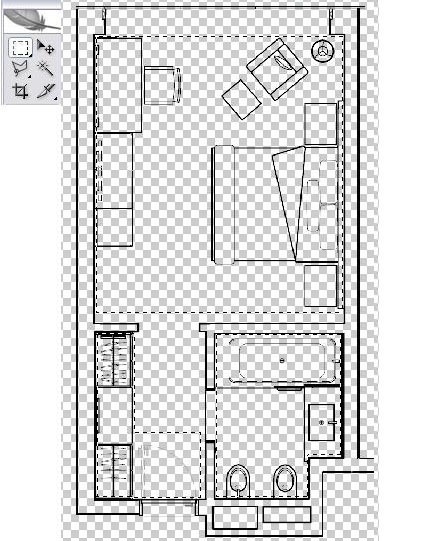
Select the layer floor and hide the other layers for now. Using the marquee tool (Press M) delete all the furniture, closet, and plumbing fixture as highlighted in the image. Include the entry door as well. Make sure NOT to include the bounding lines of the internal walls. What being done here is to make this layer prepared for the application of the flooring material. (On a side note this process works faster if there is already a set of layer prepared as pdf format from AutoCAD. But for the sake of this tutorial just follow the steps provided further).
Step 4
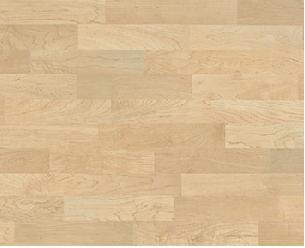
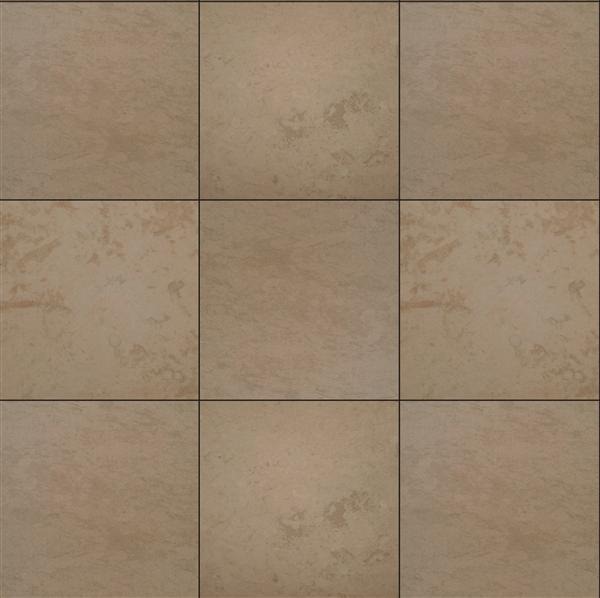
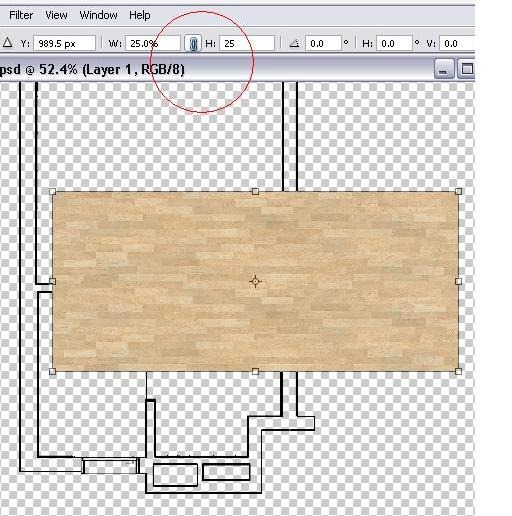
The flooring textures shown will be used for the application of materials on the floor. The jpeg files of the textures are provided in the zip file you downloaded in the beginning. Open the wood material and drag this over to the floor layer. As you can see, the wood is way too big over the floor. Use the transform tool and resize the image height to 25 as shown but be sure the aspect ratio is locked - click on the chain. Open the stone material and repeat the same process you did on the wood but this time make the image height to 5.
Step 5
Select the wood layer and use the marquee tool (Press M) and highlight a portion only of the wood. From the edit menu panel click define define pattern and click Ok. Then select the stone layer and repeat the same process but this time you may highlight the whole 3x3 tile pattern. (Note: do not highlight beyond the boundaries of the stone tile pattern.)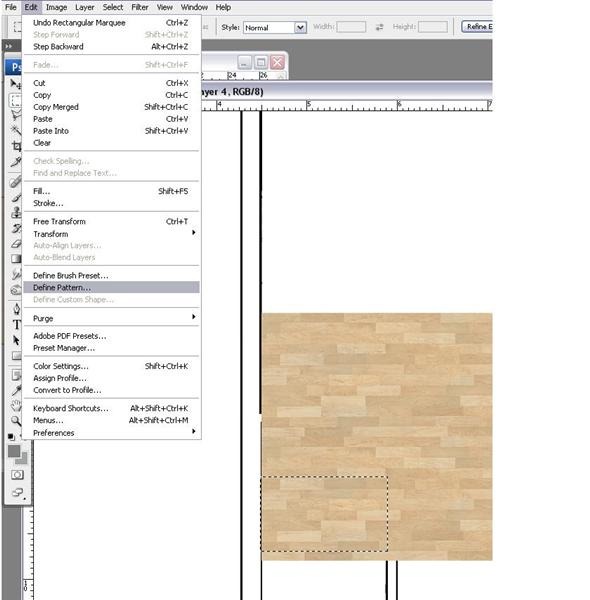
Step 6
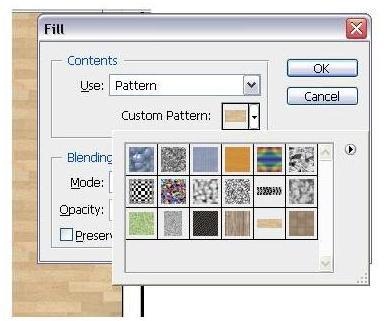
Select again the floor layer and use the wand tool (Ctrl+W) and click on the middle part of the bedroom. Press (Shift+F5) to fill in the floor material. Click on the arrow down selection and choose pattern. In this regard the wood pattern is the second from last set of patterns. Click on this and press Ok. Now click on the middle part of the bathroom area and repeat the same process earlier but choose the last pattern which is the stone from the Fill dialogue box.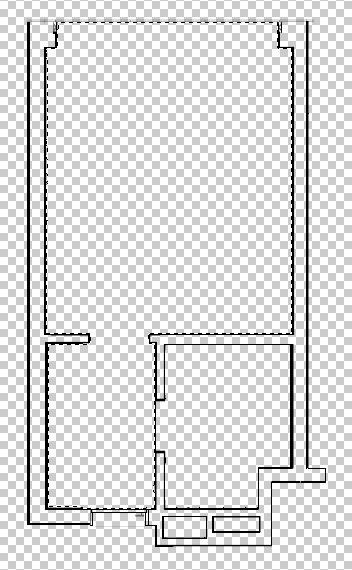
Step 7
By this time you should have arrived at the floor pattern below. You will notice I added a stone pattern in the terrace outside the bedroom. Use the marquee tool (Press M) and highlight a portion of the terrace. The size to be highlighted need not necessarily to be precise. I used the same pattern from the bathroom using the same process in Step 5. Next, you may add a little bit of glare on the floor patterns. Press O for the Dodge tool to accentuate some parts of the floor. You can use the settings I used shown below.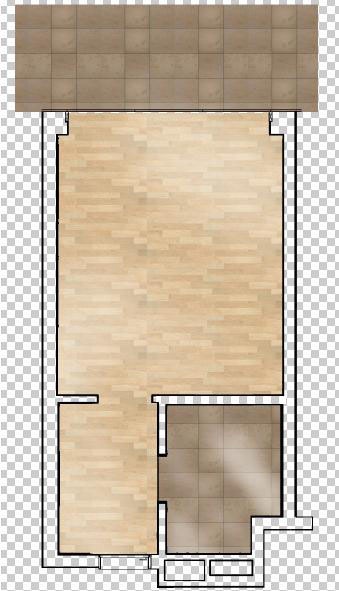
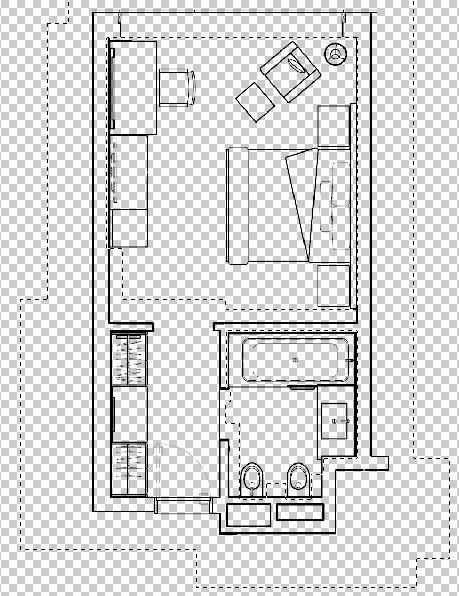
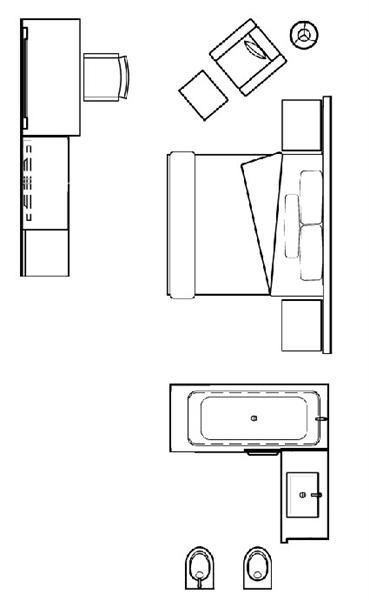
Step 8
Turn on the layer 2D plan and duplicate its layer again named as furniture-fixture. As a tip turn off all the other layers except the furniture-fixture layer. Next, using the marquee tool (Press M). Delete all the walls, closet, and door as highlighted by a selection in the image below. You may press Shift+click in order to add-up a selection of the areas to be deleted. Only the bed, chairs, desk, lamp, toilet & bidet, vanity and tub will be left as shown further below.
Step 9
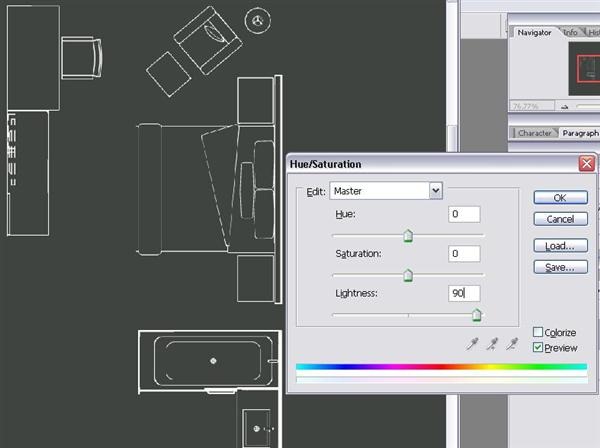
Next, create a new layer press (Shift+Ctrl+N) and name this layer as Ground. Then press (Shift+F5) to fill it with a 50% gray color. Select the layer furniture-fixture and drag this on top of the Ground layer and press (Ctrl-U) and adjust the its lightness to 90. This will make the furniture-fixture layer a bit invisible. This will then lessen the lineweights of the lines from being thick.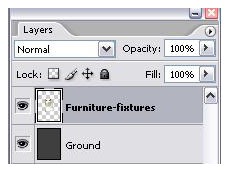
Step 10
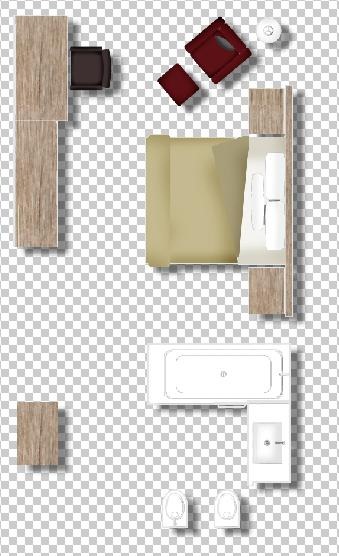
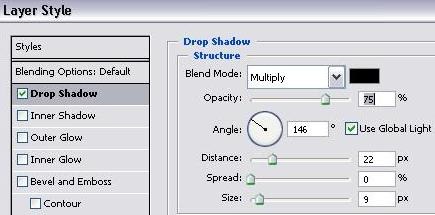
Then start filling colors at each of the furniture Use (Shift+F5) colors. I chose a dark color red for the lounge chair below and then use the burn tool to give accents for the shadings. You should then repeat the same process for the rest of the furniture. You would then achieve a similar image further below in this step. You can play with the colors you want to fill for the furniture and fixtures. For the desks, side table, and headboard I personally decided to fill them with a defined pattern similar to the process in Step 5 and a very light grey for the toilet fixtures. Lastly, add a drop shadow from layer style. You may copy the values I used as shown.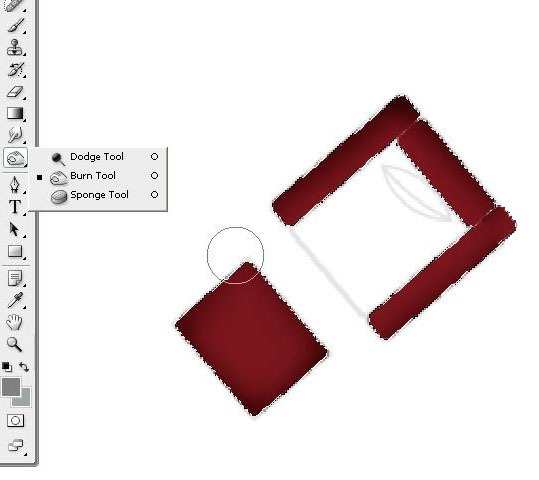
Step 11
Now turn on the layers of 2D plan and Walls and turn off the rest of the other layers. Be sure to put the 2D plan layer on top of Walls. Select the 2D plan then use the magic wand tool and pick any of the lines. Then from the Select menu use Similar and fill all the lines with a different color like red. You should come up with this.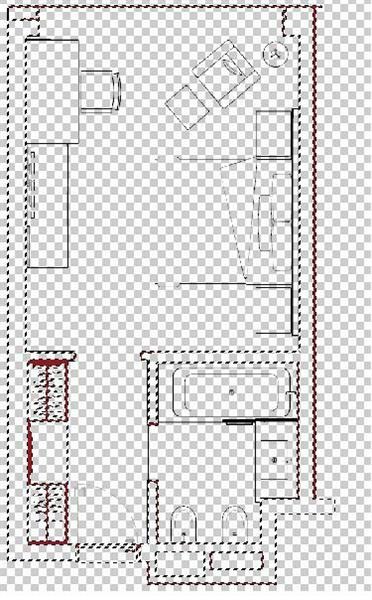
Step 12
Temporarily turn off the layer 2D plan then select again the layer Walls and delete all the furniture, fixtures, and door except the closet. You would then come up with something as neat as image below.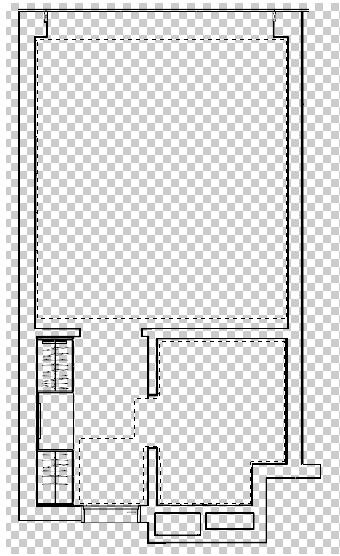
Step 13
Using the transform tool scale up the layer Walls to 120 with the aspect ratio locked. Refer to values shown. Now put Walls on top again of 2D plan layer. Then turn on the 2D plan layer. By this time you would see a larger offset of Walls over the red outline of 2D plan. Using the polygonal lasso tool you should connect the corners of the wall of Walls layer with the corners of the wall of 2D plan. Then fill the selection. The second image below in this step shows how it is done. You may refer to the third image further below to see how were the points of each wall corners were connected. Basically, I used two shades of grey. One is 50% grey and the other is much darker.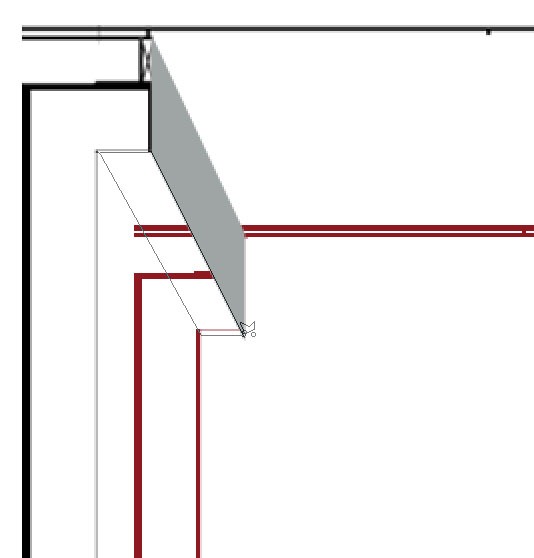
Step 14
Select the layer Walls. Now fill the inner section of the walls as shown with color white.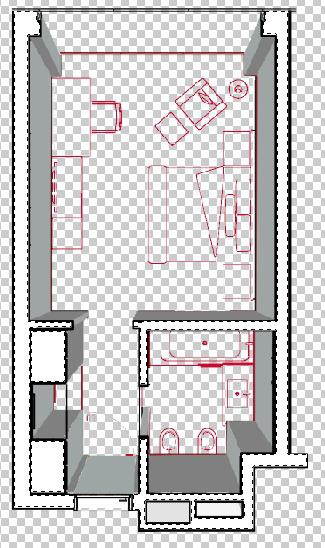
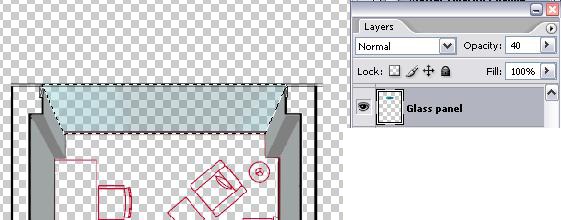
Step 15
Then using the wand tool pick the wall shown below. Delete this wall. While the selection of the wand is still present, create a new layer and rename this as Glass Panel. Fill it with a cyan color. You may opt to input the values reflected in the image below. Then set its opacity to 40%.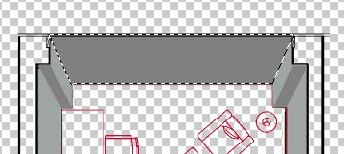

Step 16
Select again layer Walls and pres Ctrl+U to change its lightness to 85.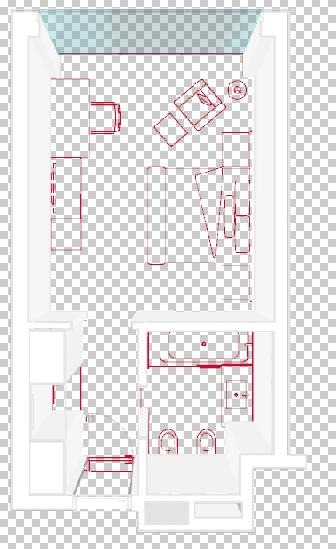
Step 17
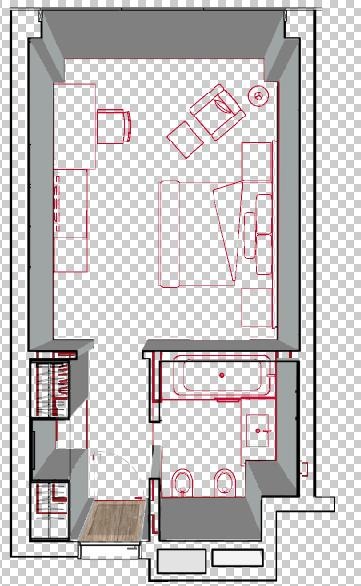
Turn on all of the layers. It may need some tweaking in which layer should be on top or below. Just follow the layer arrangement below as seen in the image. As you will see, I added some accessories in the plan like the artworks in the bedroom and bathroom, flat screen tv on the wall, a desk between the closet, and a door. You can add your own accessories and play with them and their arrangement.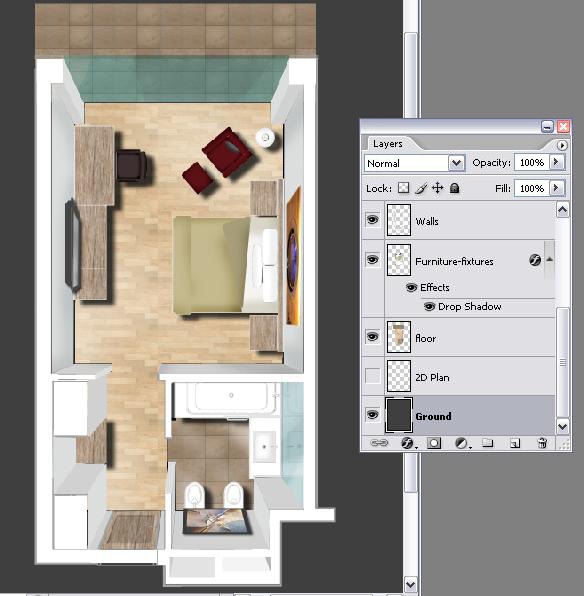 This is the end
From PhotoShop Tutorials...


